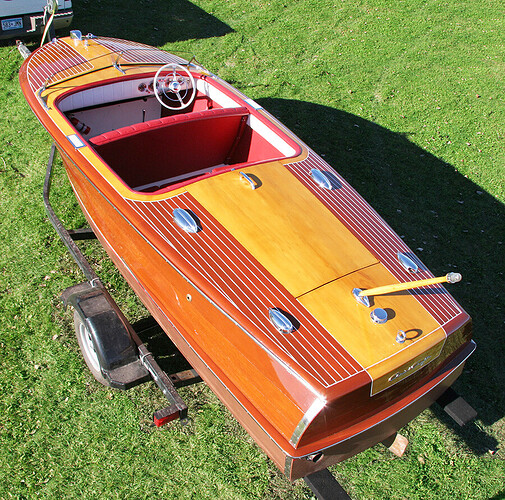
So I’m down to making the Spray Rails on a 1950 Chris Craft Riviera. Anyone have some ideas on how to make these?
Do you have the old ones? You can use them as a template.
No I don’t, I was hoping there was a trick that made it easy. ( Ha-Ha)
The Mariner’s Museum has a huge collection of to-scale shop drawings as well as hull cards for almost every Chris-Craft ever built.
I needed scale drawings for the burgee pole on my S-25 Sportsman, and ended up buying a comprehensive set of shop drawings for every aspect of this boat.
Visit: Chris-Craft - The Mariners' Museum and Park
Oops… armed with the shop drawings and some nicely straight-grained mahogany, “all” you need to do is make friends with a local cabinet shop that can fabricate the spray rails taking lines from the shop drawings.
Not an easy job even with the old ones as a pattern. First you’ll want the lengths of the sides and thickness of the splash rails.
You’ll need to mark out where they go on the boat then take the bevel angles and pattern the curves off the sides and transoms.
That will take some tricky patterning/spiling to get it right.
i could make those in an hour just by the picture.
Using the original ones as patterns is trivially easy. Simply tape the pattern piece to the side of the new rail with the inboard-sides to be absolutely flush. Scribe the exterior face.
We use a table saw to rip the topside’s bevel by placing the bottom face against the fence before we rip the outside face using a very sharp jig saw.
Finish the outside face with a block plane.
So what is the status? Are they done or still in the planing stage. Here is my brain fart for how to do this. Place two or three equal height saw horses up close to the boat. Place an approximately 18 to 24 inch pieces of plywood on the saw horses the length and at the same height as the original splash rails you need to make the new splash rails. Using a scrap piece of any wood make a scribe tool. If you have one of the small plastic squares, fasten it to one end of the wood piece so as you move the tool along the side of the boat you keep it square to the line of the curve. Measure the distance between the straight edge of the plywood and the greatest gap to the curved shape of the hull. Use this dimension plus an inch or two to drill a hole just the right size to push a pencil into and hold the pencil tight. Put some pattern paper on the plywood by taping it down tight, now with the Scribe tool agents the hull mark the line on the paper. Make a second hole two or 2.5 inches (what ever the width of the original was.) away from the first to create the outer line of the splash board. Transfer to your wood and cut and profile to your liking. I’m lucky because a Great Uncle and Great Grand Father left me a very large pair of steel dividers which I can do this with. Like 18 inches long made out of 1/2 inch steel. I also make my own when I need to just like described in this text.
Thanks for the reply. I’ve completed the task. I ended up by basically just carving them. Holding the piece up to the boat then carving where they needed it. Took awhile but I’m happy how they turned out. Not professional but works for me.
Thanks for the reply Warren. Glad you have them done.
